
The 21-Point Roof Inspection Checklist for Westfield Homeowners
A thorough roof inspection in Westfield covers 21 points across five areas: the exterior covering, the flashing at every joint and penetration, the attic underside, the drainage system, and a written, photo-documented report. The covering shows wear, the flashing shows where water gets in, the attic shows where water has already been, the drainage shows where water goes next, and the report turns all of it into a ranked plan. If an inspection skips any of these five areas, it is incomplete — no matter how quickly it was done.

Homeowners often ask what they are actually paying for when they book an inspection. This checklist answers that question point by point. Use it in two ways: first, as a guide to what to look for yourself from the ground and in the attic; second, as a standard to hold any inspection report against. When your report arrives, check it against these 21 points. Anything missing is a question worth asking.
One caution: do not climb onto your own roof to work through this list — roofs are steep and surfaces can be slippery. The ground-level and attic points are safe for a homeowner; the on-roof points belong to an inspector with the right equipment. For what a professional visit includes, see our roof inspection cost guide for Westfield, MA.
Exterior: The Covering, Slopes, and Penetrations
Covering damage is the most visible sign of trouble, but a slope-by-slope look matters more than a glance at the front of the house: damage often concentrates on one slope while the rest looks fine. Each point below is checked on every accessible slope.
- Missing shingles or tiles: gaps in the covering where wind or age has removed pieces, leaving underlayment or decking exposed.
- Cracked, curled, or lifted shingles: edges that have curled, tabs that have cracked, or pieces that no longer lie flat and sealed.
- Granule loss and bald patches: worn areas where the protective surface has thinned, often visible as granules collecting in gutters.
- Valleys: the channels where two slopes meet and water concentrates — checked for wear, debris, and open seams.
- Ridge and hip caps: the caps along peaks and hips, which take the most wind exposure and are often the first to loosen.
- Penetrations: vents, pipes, and skylights, checked for cracked boots, failed seals, and gaps where the covering meets the penetration.
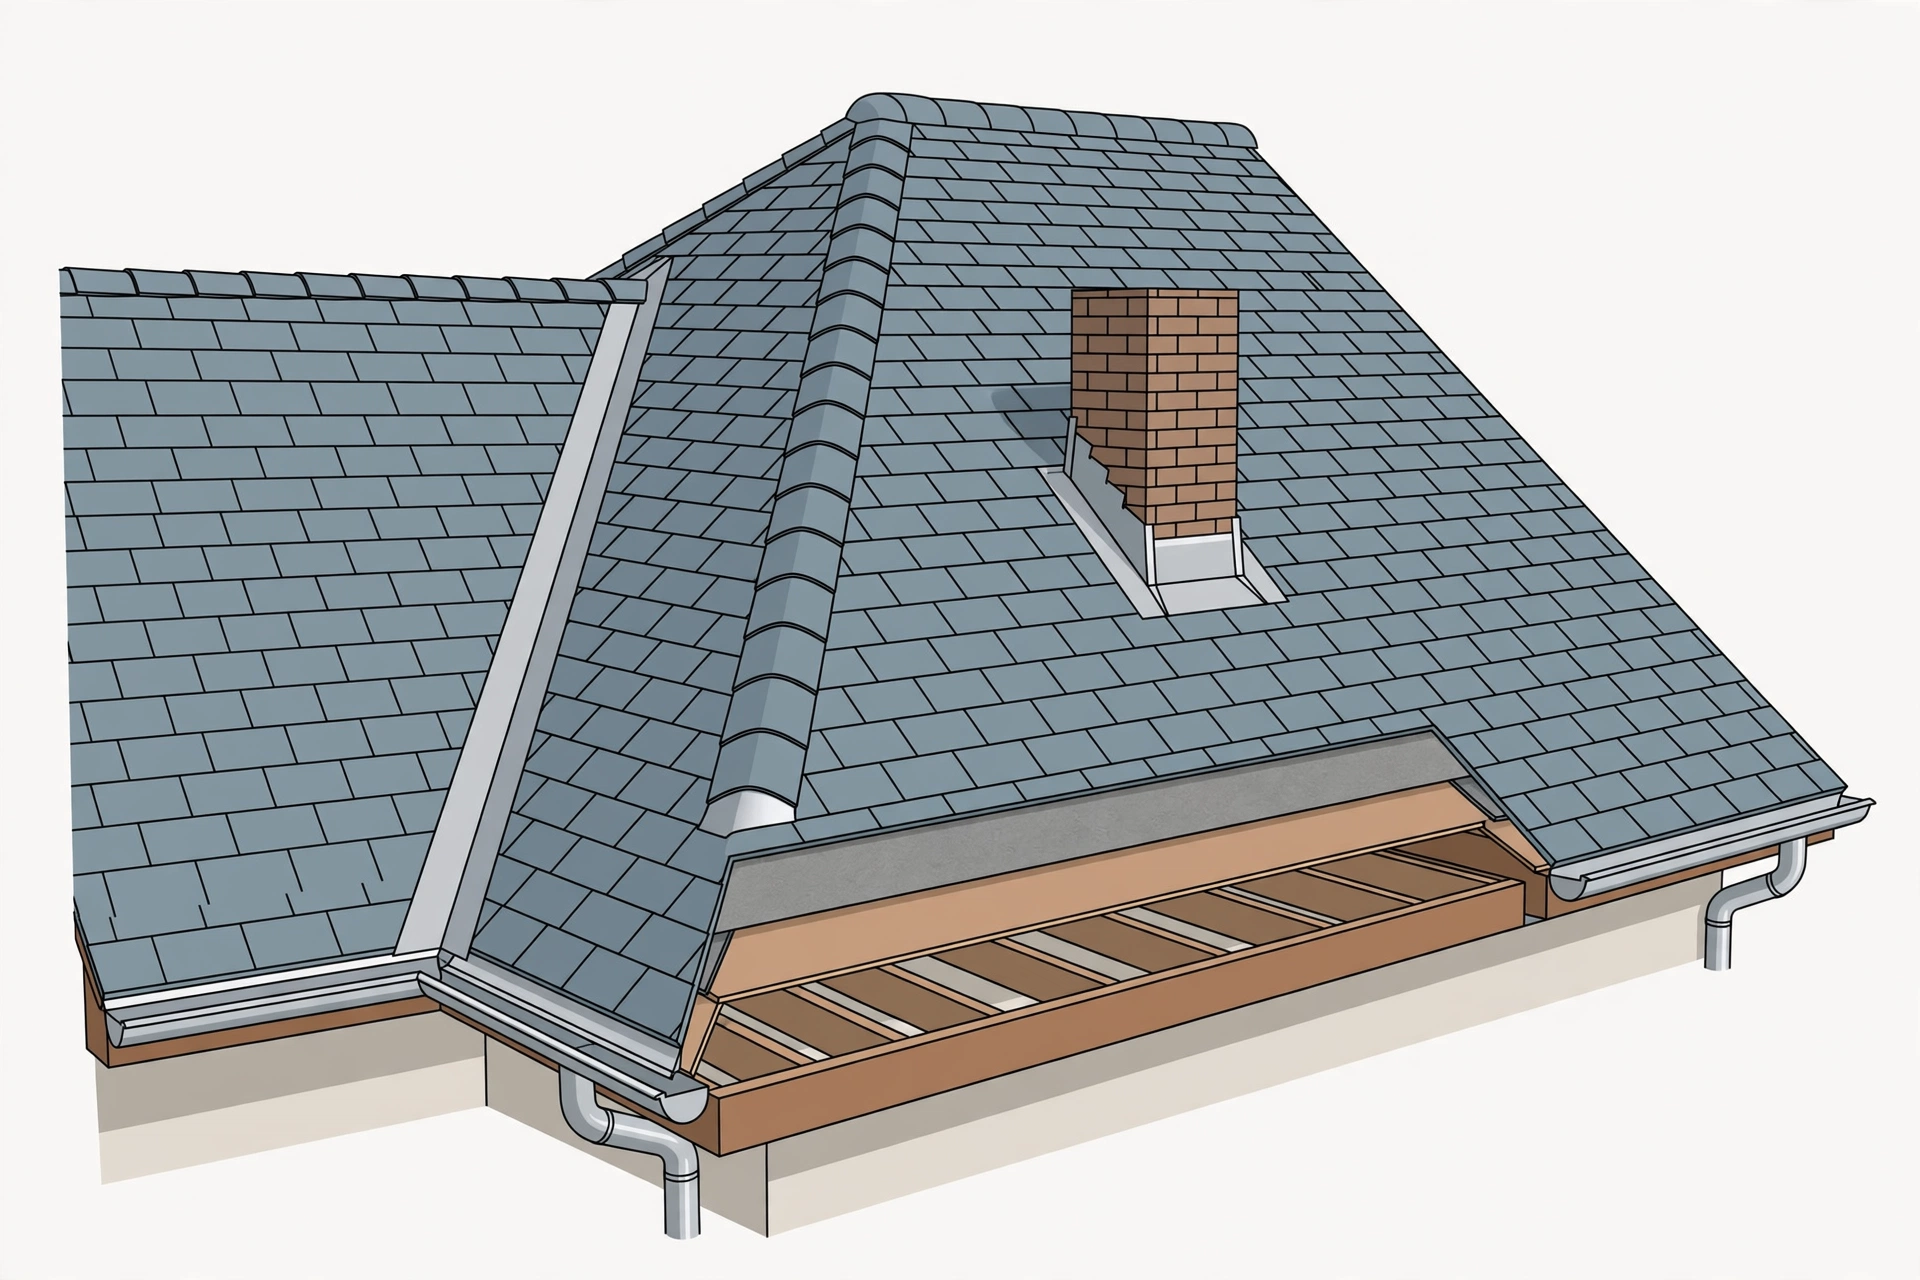
Flashing: Where Roofs Most Often Leak
Flashing is the metal or membrane that seals the joints of a roof — wherever the roof meets a wall, a chimney, or another roof plane. It is the least glamorous part of the system and the most common source of leaks, because every joint is a place water can find a way in if the seal has lifted, cracked, or corroded. A careful inspector spends a disproportionate amount of time here, and so should your report.
- Chimney flashing: step flashing and counter-flashing where the chimney meets the roof, checked for gaps, rust, and failed sealant.
- Wall flashing: the joints where a roof slope meets a vertical wall, including dormers and additions, checked for lifting and open seams.
- Valley flashing: the metal or membrane beneath valley covering, checked for corrosion, displacement, and debris damming water.
- Vent and pipe flashing: boots and collars around every vent and pipe, checked for cracking, shrinkage, and seal failure.
If you have a leak far from any obvious roof damage, flashing is the first suspect — the indoor stain rarely sits directly below the entry point, since water travels along decking first. That is why a leak inspection traces the path rather than just patching above the stain.
Attic: What the Underside Reveals
The attic is the roof's underside, and it tells a story the exterior cannot. Stains, damp insulation, and daylight through gaps all show up here before they show up in a living room ceiling. An inspection that never enters the attic — where access allows — is missing the evidence that confirms or clears a suspected leak.
- Decking condition: the underside of the roof deck, checked for stains, soft spots, sagging, and signs of past or active moisture.
- Daylight and gaps: any daylight visible through the deck, which marks holes, gaps, or failed covering that need attention.
- Insulation and moisture: insulation checked for dampness, compression, and staining that points to a slow, hidden leak.
- Ventilation: intake and exhaust airflow checked for blockages, since trapped moisture and heat age a roof from the inside out.
Attic access is not always possible — some attics are sealed, too low, or unsafe — and a good report says so plainly rather than silently skipping the section. If yours was not checked, ask why and what the alternative was.
Drainage: Gutters, Downspouts, and Water Paths
A roof's job is not just to shed water but to send it somewhere harmless. When drainage fails, water pools, backs up under covering, overflows near the foundation, and rots fascia and soffits. Drainage points are easy to overlook because they sit at the roof's edge, but they decide whether the rest of the system lasts.
- Gutters: checked for sagging, separation, rust, leaks at joints, and debris that blocks flow.
- Downspouts: checked for blockages, disconnection, and whether discharge is directed away from the foundation.
- Fascia and soffits: the boards and panels at the roof edge, checked for rot, staining, and pest or moisture damage.
- Ponding and runoff paths: low areas and runoff routes where water collects or runs back toward the structure instead of away from it.
After a heavy storm, drainage problems announce themselves quickly — overflowing gutters and water near the foundation. If you notice those signs, a storm damage inspection can document whether the storm caused new damage or exposed an existing weakness.
The Report: Turning 21 Points into a Plan
The final three points are not about the roof at all — they are about the document you receive. An inspection without a usable report is an opinion you cannot act on, compare, or hand to anyone else. When the report arrives, check it for these:
- Photo documentation: dated, captioned photos for each slope and each finding, so you can see what the inspector saw.
- Ranked findings: problems ordered by urgency — active leaks and water entry first, wear and monitoring items after — not a flat list.
- Clear next steps: what to fix, what to monitor, and what to re-check at the next inspection, in plain language.
Keep the report with your home records. It is the baseline for the next inspection, evidence for a future claim if you ever need one — check your policy and call to confirm what it expects — and, if you sell, a document a buyer will take seriously. Our pre-purchase inspection guide explains how buyers use this kind of report.
Related reading: roof inspection cost in Westfield, MA, roof leak inspection in Westfield, and storm damage roof inspection.
Get the Full 21-Point Check on Your Roof
Book a written, photo-documented inspection covering all 21 points. Call (213) 646-7883.
Residential Roof InspectionsFrequently Asked Questions
You can use it from the ground and in the attic to spot warning signs, but it is not a substitute for a professional inspection. An inspector walks the roof where it is safe to do so, photographs each slope, and checks details — flashing seals, decking, ventilation — that are hard to judge without training and access. Use the checklist to know what to ask about, not to replace the visit.
Flashing, because it is where most leaks start. Covering damage is visible and dramatic, but a small gap at a chimney, wall, or vent can admit water for a long time before it shows indoors. If your report is thin on flashing detail, ask for more.
It depends on roof size, pitch, stories, and access, and on whether the attic is accessible. A small, walkable, single-story roof is faster than a large, steep, multi-story roof. Ask what the visit includes — slopes walked, attic checked, photos provided — rather than judging by time alone.
Start with active leaks and anything admitting water, then flashing and drainage, then general covering wear. Ask the inspector to rank findings by urgency and to separate what needs attention soon from what to monitor at the next inspection. A good report makes that order clear.